Use Case: Use of "Data Visualization" component in UI builder
Use Case : How to use "Data visualization" component in UI builder
Add one container and divide in 3 column and 1 row

Add component called – "Data visualization" under container
Add Data Visualization type = "Single Score"
Add "Data source" = Incident Table and add Custome filter (E.g = Active =true)
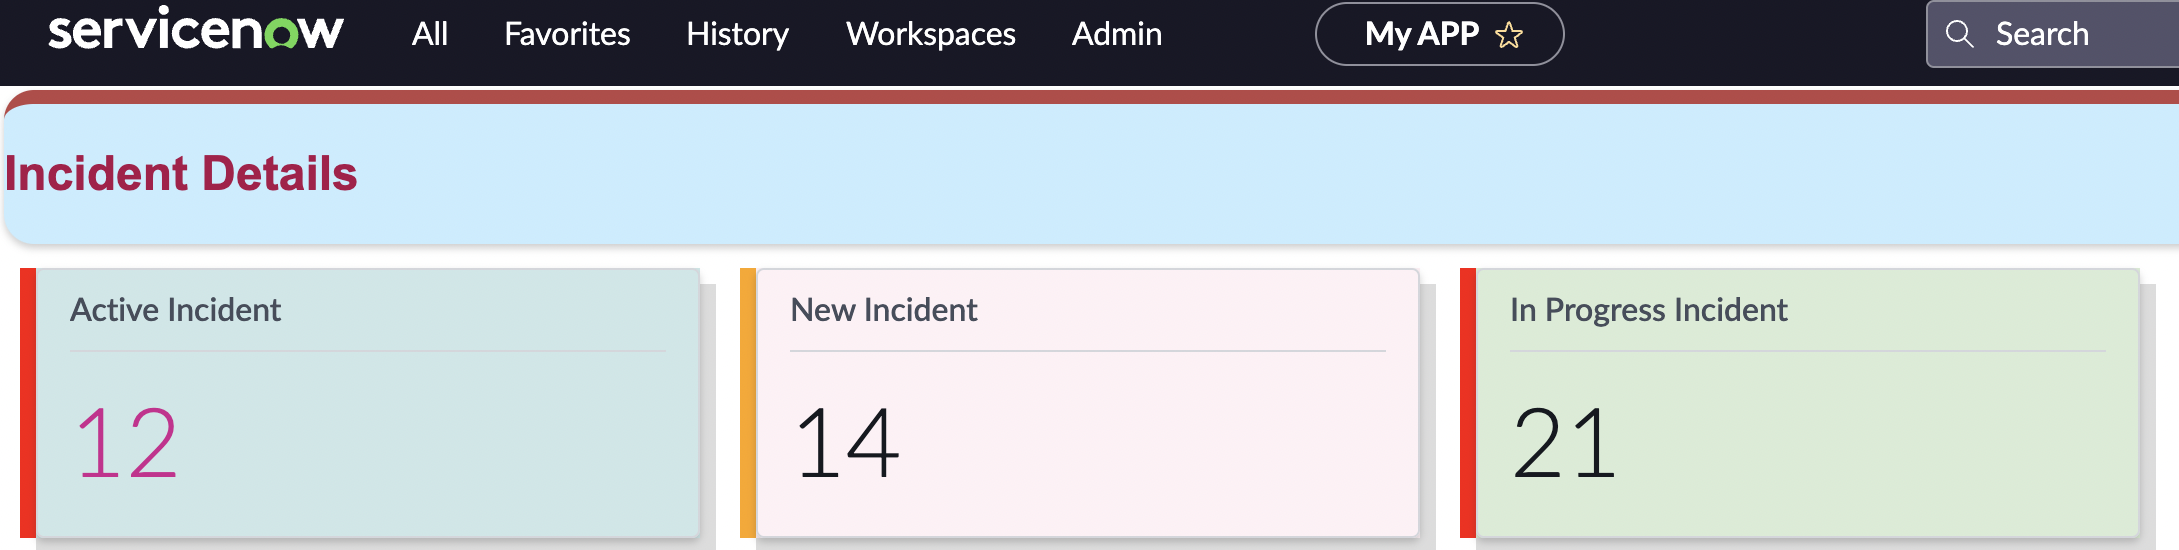
Add "chart Tittle" = "Active Incident" under configuration like below

Use below css under "Style" to make to colourful
* {
border-left:8pxsolidred;
background-color:rgb(204, 231, 232);
box-shadow:8px8pxgainsboro;
margin:10px10px10px10px;
}
Final Result

Use Case : Ansible Integration via Flow Designer ServiceNow
Hands on Use Case : Ansible Integration from scratch via Flow Designer ServiceNow
Step
- Go to Flow Designer
- Go To "Action"
- Create new Action

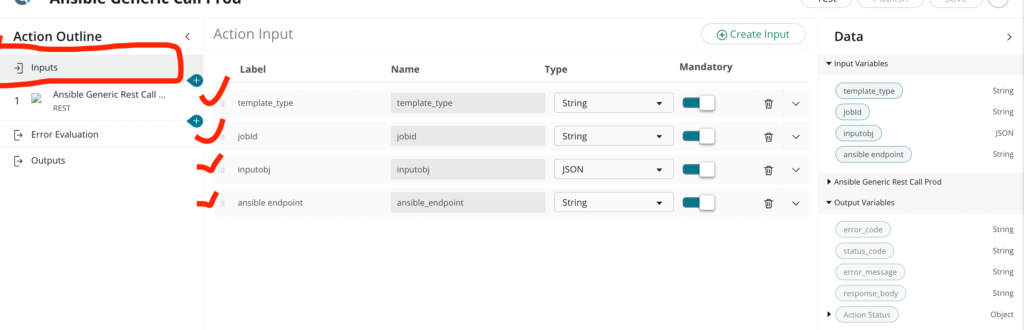
4. Add input Parameters
- template_type -> Every Ansible Job would have templete type which would be provided by Ansible Team.JOBID -> Each Ansible Tower has unique JobID which will also provided by Ansible Team.InputObj : It's kind of Payload in which you will pass the parameter details.
Endpoint Example : https://ansibledev.abc.com
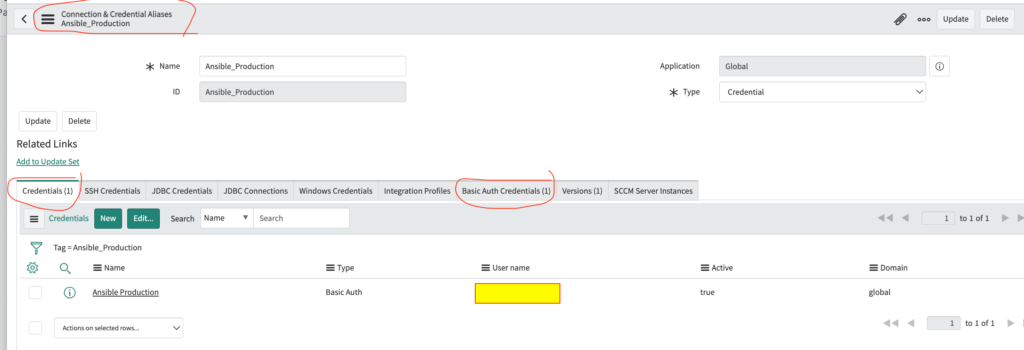
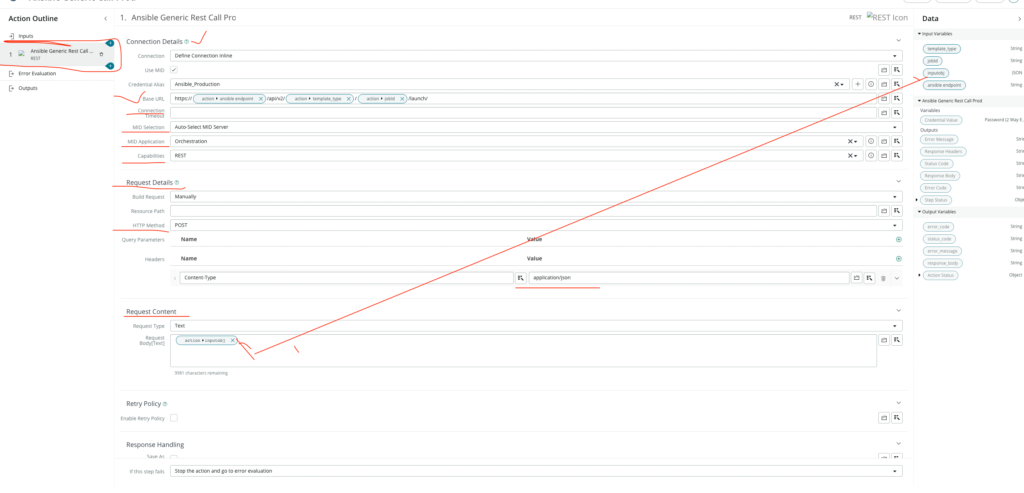
5. Make Rest API CALL to Ansible End point
- Created connection & credential in service-now module and Add to the Rest API "connection details" your ACTION. Fill all the details as per the below.
6. Add Output to see Ansible Response body.
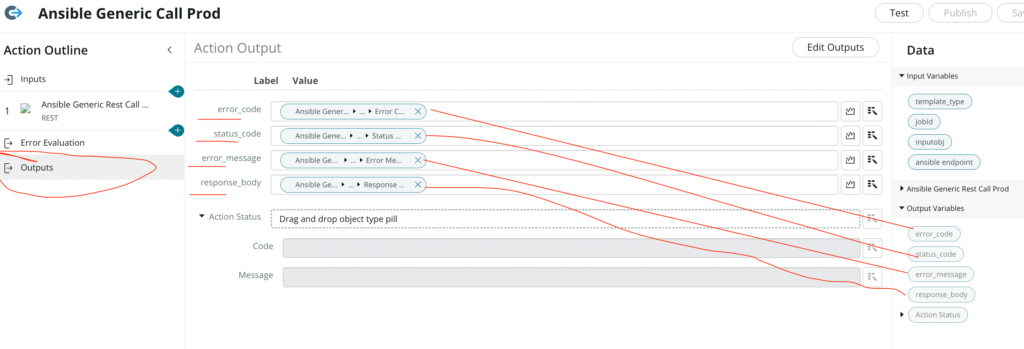
7. Save and Publish your ACTION.
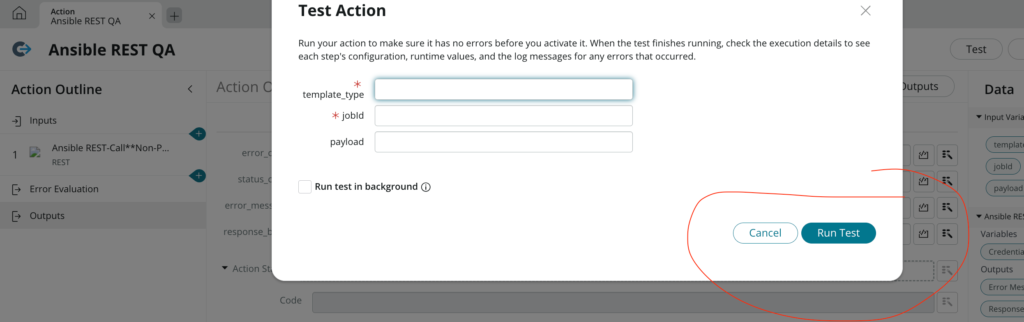
8. You can TEST it after publishing the ACTION.
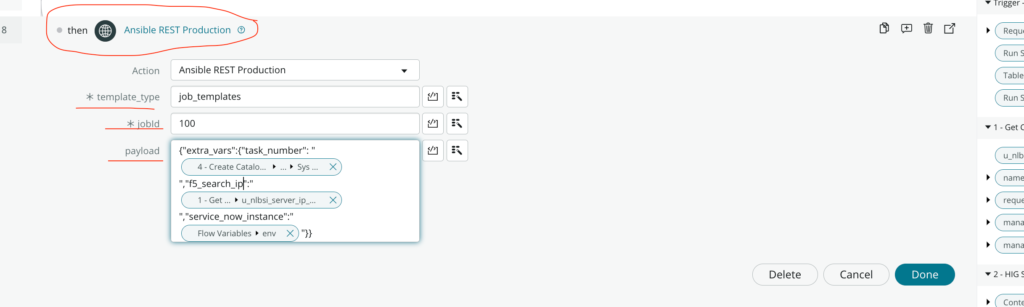
9. CALL YOUR ACTION IN YOUR FLOW -Where you can pass the parameter coming from any trigger table.
Use Case : IntegrationHub
Use Case: Problem ticket creation from once one instance to another instance using integrationHub.
Step 1. Creating a Spoke
- The process to create a spoke is the same as the process to create a scoped application
- Created 1 app named Integration hub problem Spoke.

- Create Flow using Flow Designer.

- Create a trigger condition in this.

- Create an Action using Action Designer.
- Create Input.
Add the input variable that you need to refer from source to destination. Example; Problem record

- Create a Payload using Payload Bulider Step:
- Create name-value pairs in JSON and XML payloads using dynamic data.

- Create 1st Connections and Credentials for next steps :
- My connection url : https://dev81130.service-now.com (another instance)
- Credential : Provided by target instance (other instance)
- https://dev81130.service-now.com (Will be created on this instance)

- Add a Rest Step in Action to call the target instance.


- Then we will parse the response body and will fetch the problem number created on target instance.

- Now, We will update the source record with Correlation Id = Problem Number in target Incident.


- Save and Publish the action and add it in the flow designer.
- Activate the Flow so that the flow is live.

Problem created on my instance: PRB004004
Target instance result screenshot:

Note : Target instance user credential must have the Read & write access for problem record.